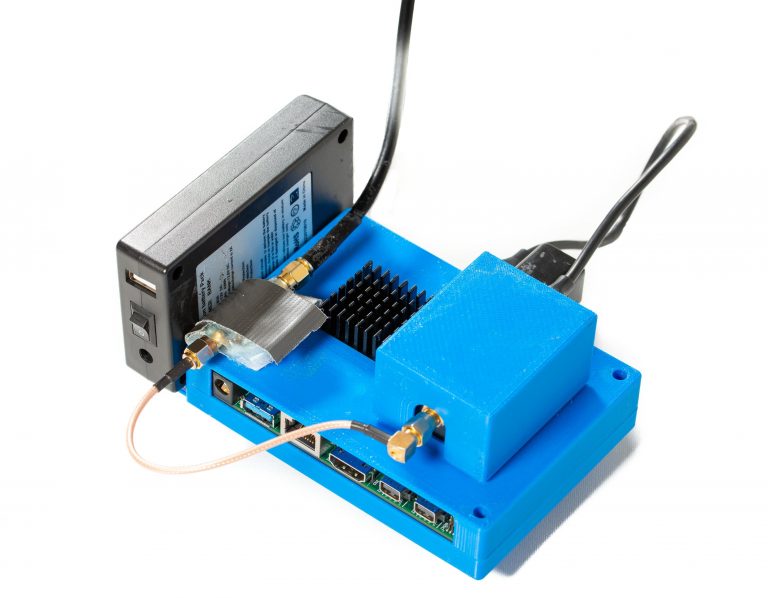
The following section details the setup for the radio telemetry (RT) sub-system. Although various choices are available for companion computers, this project utilizes a UDOO because of the compact processing power it provides (see material list below). The UDOO does all the on-board processing for gathering signal data (i.e. it records the incoming I/Q data from the Airspy) and by establishing a Wi-Fi link with the Udoo the user can start/stop the radio from the GCS and load data from the UAV. This guide will provide step-by-step installation instructions for constructing the RT unit and installing it on-board the UAV.
Materials
- UDOO x86 Ultra
- Compatible power supply unit
- AirSpy
- 3D-printed case (download here)
- Phillips Screwdriver
- Small screws and bolts
- Velcro
- Compatible CPU fan (optional)
Assembly

1. Print Case
The case used to house the AirSpy, UDOO, and portable battery is a custom design. The CAD drawings are available on the download page. Before building the case it is necessary to print both the top and bottom component of the case on a 3D printer.
2. Build Case
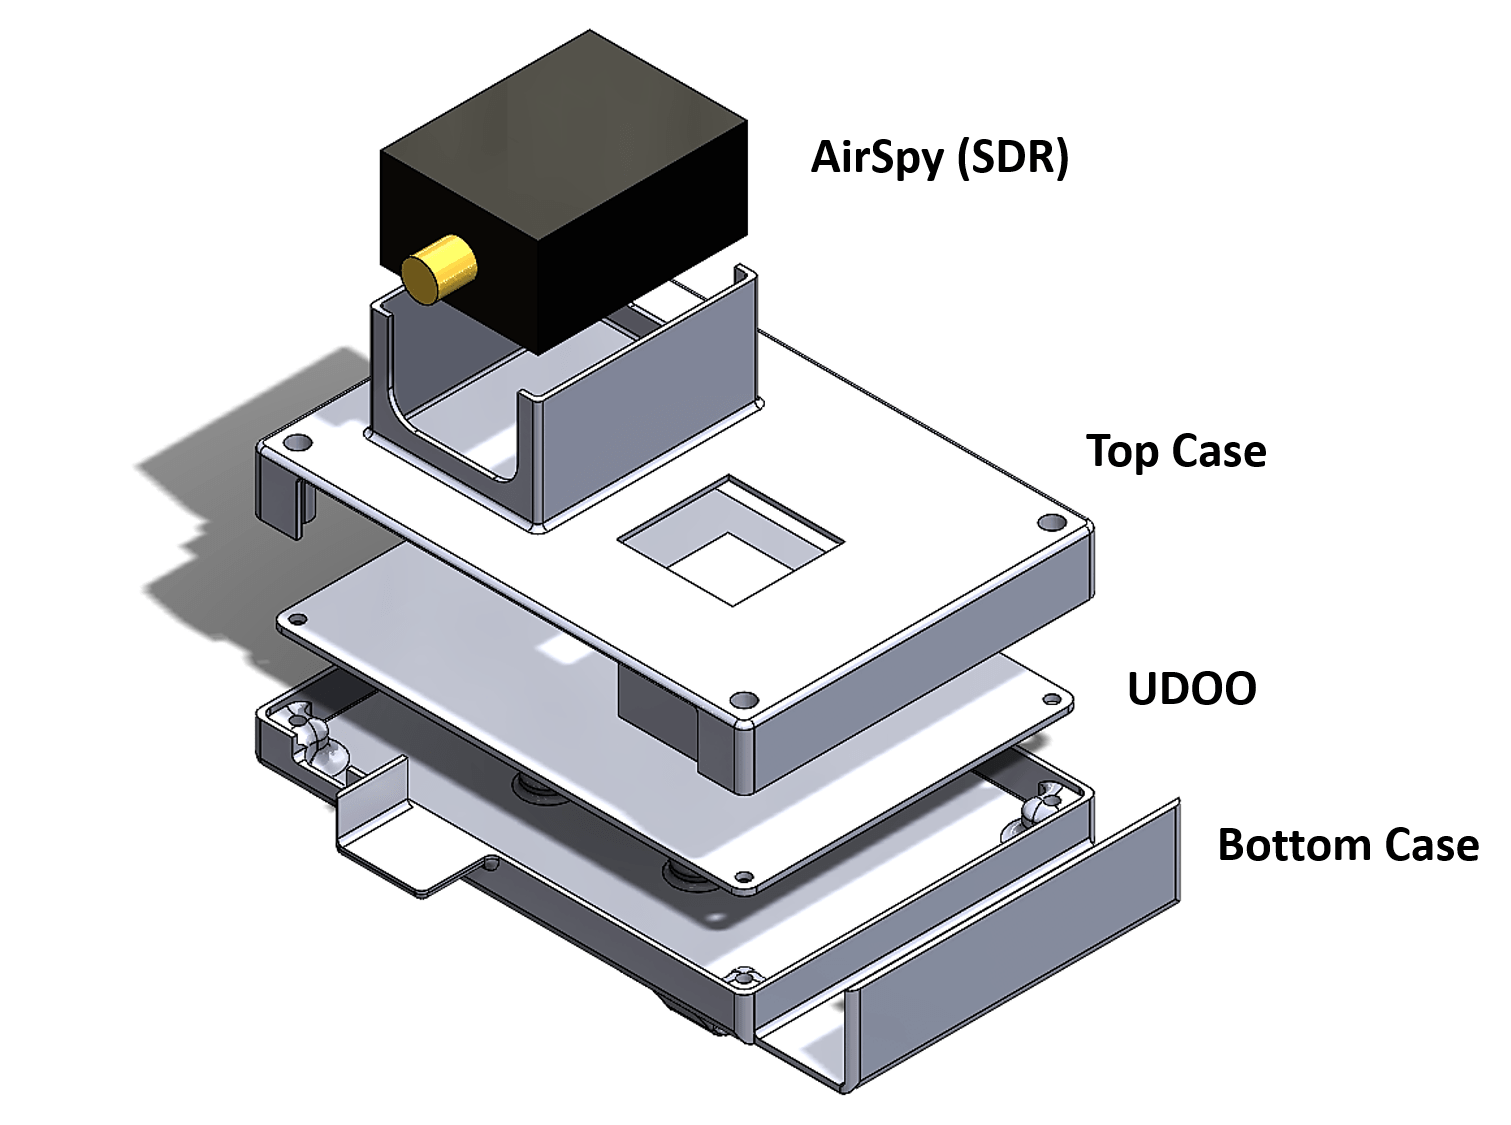
With the 3D components printed, build the case as shown in the diagram below. Small screws and bolts are used to affix the UDOO case in the four corners, sandwiching the UDOO securely between the top and bottom half. Velcro is placed on the bottom of the AirSpy to keep the device securely fastened to the top of the case.
note: if you desire you can install the CPU fan during this step. Simply plug it into the board using the port labeled “FAN” and screw the fan to the top of the black heat-sink until secure.

3. Software Installation
Please complete the software installations before proceeding. The complete steps are available on the Software Installation Page.
4. Mount to UAV
Mount the case to the top of UAV using two carbon fiber rods and the holes on the bottom of the case. A video demonstration is provided below:
5. Connect USB Components
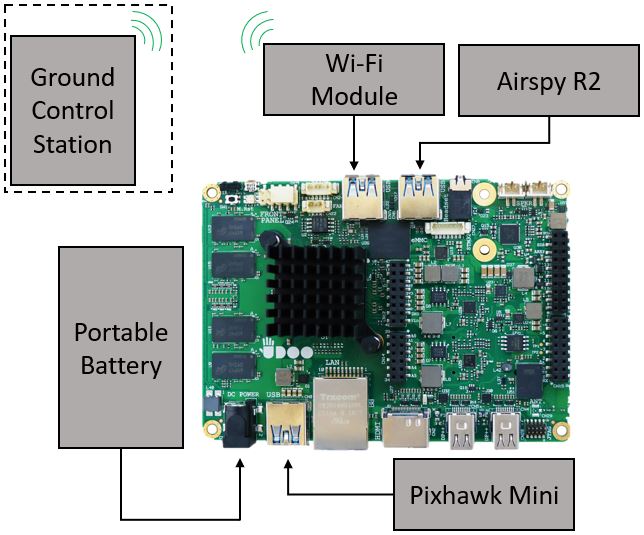
For the onboard system, there are a number of components that need to be connected to the UDOO. Below is a simple diagram of USB components mounted to the UDOO when on the vehicle. The various USB connections sync information with the flight controller, host a Wi-Fi connection, and transport incoming radio data. For additional information reference the tutorial video.
